Focus the tilt & shift lens
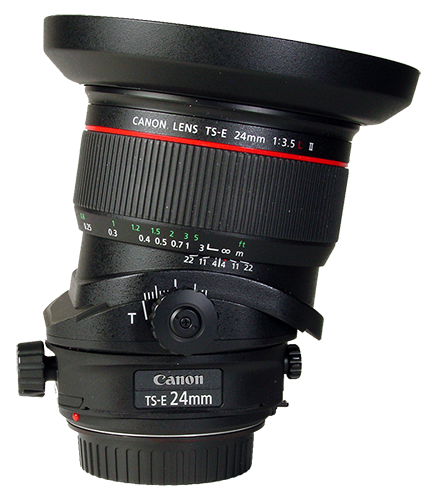
(Canon TS-E 24mm f / 3.5L II)
Author: Dr. Dr. Rolf Klett
Tilt & Shift lenses are mainly used in architecture, landscape and table-top photography to minimize converging lines or to precisely define the focus area. In accordance with the Scheimpflug rule, these special lenses allow the tilt and shift of the lens to be set separately, so that perspective (converging lines) and depth of field can be regulated independently of one another.
In landscape photography, tilt & shift lenses are more often used instead of normal wide-angle lenses. On the one hand, one tries to avoid quickly aligned perspectives in the wide-angle range, because it makes distant areas (e.g. mountains) appear too small. On the other hand, one often wants to image the entire area from very close objects up to the distant horizon at the same time, without stopping down the lens too much. This is especially true when the nearby objects are to be imaged with the camera tilted sharply downwards, i.e. more from above.
The separate setting of the tilt and pan with simultaneous manual focusing generally requires a great deal of experience and is associated with greater expenditure of time, even for experienced photographers. This is made even more difficult because Tilt & Shift lenses can only be focused manually and all adjustments can influence each other. Finding the correct tilt angle is particularly difficult. It must be set very sensitively depending on the recording situation. Small changes in this angle usually cause immediate loss of focus on the plane of focus. In addition, one is usually tempted to choose this tilt angle too large.
David Summerhayes describes how focusing can be facilitated using a table. I took up these thoughts, processed them mathematically and tested them experimentally in the studio using the Canon TS-E 24mm f / 3.5L II tilt & shift lens as an example. The lens has a focal length of 24 mm, a tilt angle of ± 8.5 °, a swivel range (shift) of ± 12 mm and a rotation angle of ± 90 ° for tilt and swivel.
Mathematical basics
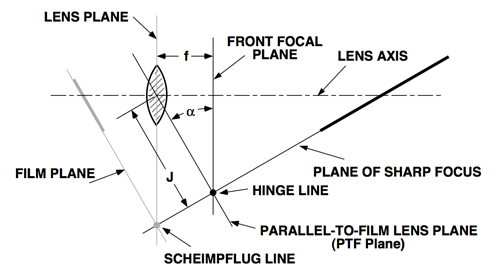
The following sketch from the standard work by Harold M. Merklinger, Focusing the View Camera, illustrates the optical relationships.
The tilt angle (a) depends on the focal length (f) of the lens, the orientation of the object plane in the focus area (focus plane) and the distance (J) of the lens to the focus plane. This focussing plane can be horizontal (e.g. water surface) or an ascending or descending plane on which the objects are located at different distances (e.g. extensive meadow of flowers) that are to be shown in focus.
The distance (J) is measured from the center of the lens to the focusing plane (running parallel to the film or sensor plane). The relationship applies
Tilt angle = arcsin (f / J) * 180 ° / pi.
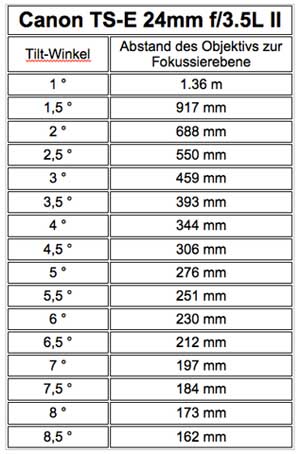
This results in the following table for the tilt angle depending on the distance:
Practical use
First open the aperture fully. After the camera position has been selected and the stand height has been determined (tripod), the subject is sighted and the distance between the lens and the focusing plane (subject plane) is measured parallel to the sensor plane. In landscape photography you can use the height of the lens above the ground for flat or slightly sloping terrain. Then you set the corresponding tilt angle according to the table on the lens. Now realign the camera to the subject and focus on the center of the image. If necessary, correct perspective (aligned lines) by changing the shift setting and align the image section by tilting the camera according to the subject. The camera position and the tilt angle remain unchanged.
Shifting has no noticeable effect on the image sharpness. If the camera is tilted differently, it remains so small in the context of the subject adaptation that it is usually not necessary to change the tilt angle. However, since the distance to the object changes, you have to re-focus on the center of the image by turning the focusing ring. Scan image at 10x magnification in Lifeview mode and check the sharpness result. Any remaining marginal blurring will disappear even with moderate stopping down. However, should readjustments by adjusting the tilt angle (due to inaccurate distance measurement) be necessary, this should be carried out very sensitively and then refocused. Only now fade down to the desired value.
That’s the theory. In practice, however, you have to take into account that the adjustment of the tilt angle on the scale on the lens is not particularly sensitive and residual errors in the focus area are possible. But by using the table you get good results straight away that only require minor corrections or can be eliminated or minimized by fading out.
It should also be noted that the described method of focusing becomes more error-prone, the smaller the distance to the focusing plane, because deviations in the distance measurement then have a stronger effect on the tilt angle in percentage terms (see table).
Application example
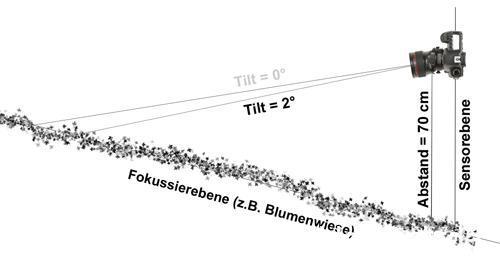
The camera is attached to the tripod and the lens (tilt adjustment screw) is 70 cm above a flower meadow (measured parallel to the sensor plane). The table shows a tilt angle of 2 ° at 688 mm (= approx. 70 cm). Adjust this with an incline downwards, aim at the subject and focus on the center of the image. Now you can make perspective corrections by shifting without having to refocus first. If it is then necessary to change the inclination of the camera (the tilt angle remains constant) for a subject-appropriate image section, the sharpness must be corrected by turning the focus ring, because the distance to the subject has changed. Any remaining edge blurring due to inaccurate distance measurement should disappear through moderate stopping down. Now fade down to the desired values.
Important: To determine the exposure parameters, set Tilt and Shift to zero, otherwise the measurement will be incorrect!
Experimental verification
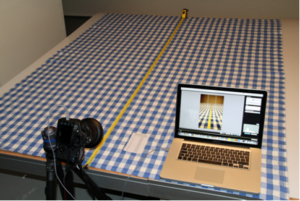
The following test setup in the studio shows how well the table has proven itself in practice. On a horizontal table there is a tablecloth with a checkered pattern of 4×4 cm to assess the perspective. There is also a measuring tape on top that shows a range from 0 to 190 cm. The table represents the focussing plane.
A Canon EOS 5D Mark II in portrait position is attached to a Gitzo tripod with a Novoflex ball head and brought so close to the table that the lens is perpendicular to the beginning of the measuring tape. The vertical distance between the lens and the table (focusing plane) is measured with a ruler. Since the exact geometry of the lens is not known, the distance to the adjusting wheel for the tilt angle is measured. The camera is raised and fixed at a distance of 55 cm.
Exposure is done with studio flash by radio triggering. The sensitivity is set to ISO 100 and the lens is fully open (f / 3.5). The sharpness control takes place both on the screen of a 15 “MacBook Pro or by 10x magnification in Lifeview mode. After each new setting of the tilt or shift values or camera rotation, the focus is checked again in the center of the image and, if necessary, refocused.
Experimental set-up
Results
Test 1:
First, tilt and shift were set to normal values (zero) on the fully opened lens and the camera was tilted so that the center of the image points to 50 cm of the tape measure. As expected, the result shows full sharpness at 50 cm, but quickly decreasing sharpness in the near and far range (Fig. 1).
Test 2:
Now the lens, which is 55 cm above the focussing plane (table), has been tilted downwards according to the table (see note) with a tilt angle of 2.5 ° (Fig. 2). There is now a very good sharpness over the full range of the tape measure. I would like to point out that no further fine adjustments were made to the tilt angle in order to further improve the sharpness in the edge areas.
Note: The distance was incorrectly set to 55 cm. Since the camera was inclined at approx. 45 °, a distance to the table level (measured parallel to the sensor level) of approx. 78 cm and a tilt angle of approx. 2 °, i.e. half a degree less, should have been taken as a basis. It is noteworthy that, as shown in Figure 2, this hardly had any effect on the focus area. The following tests remain unaffected anyway.
Test 3:
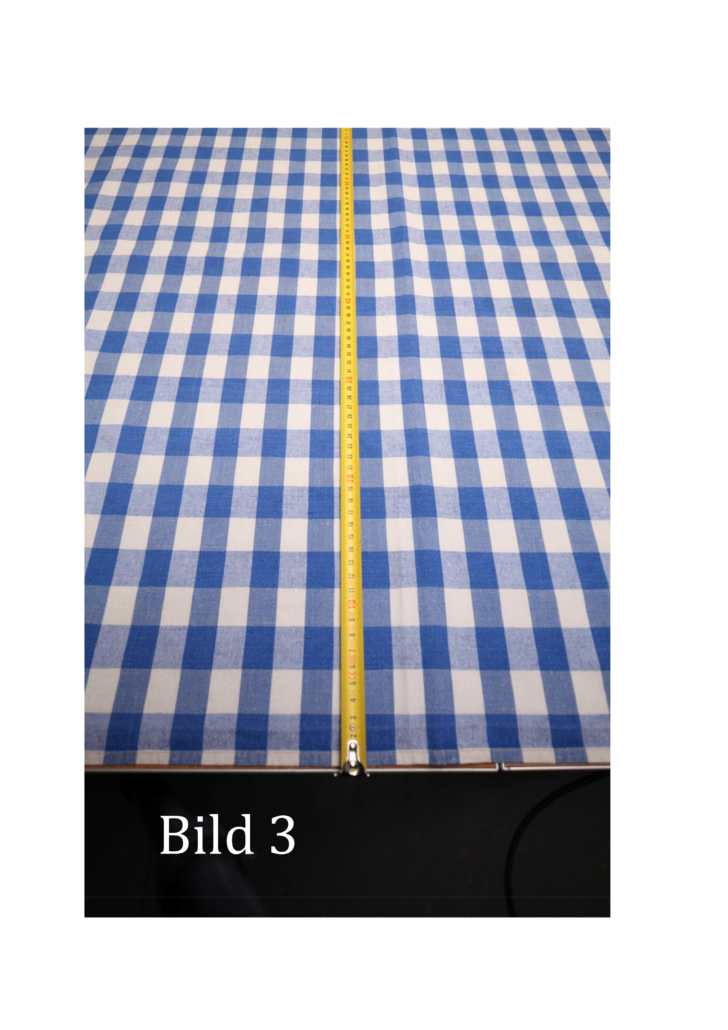
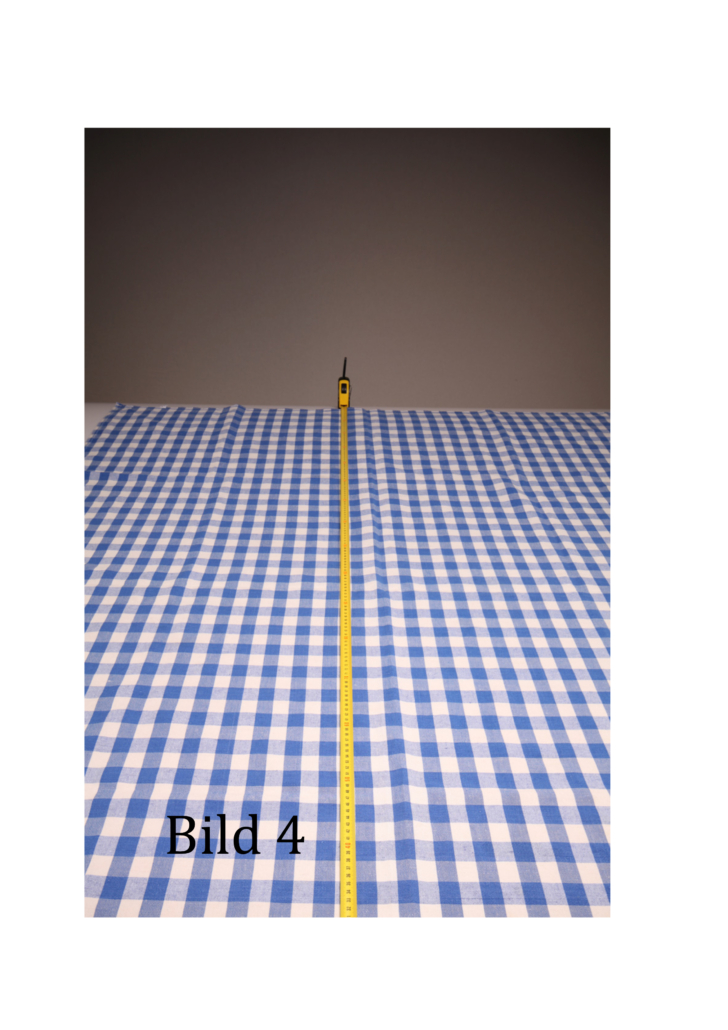
It was now checked whether shifting the lens resulted in changes in sharpness. With a maximum possible shift of 12.5 mm up and down, the sharpness is fully retained (Fig. 3 and 4). Refocusing was not necessary after shifting.
Test 4:
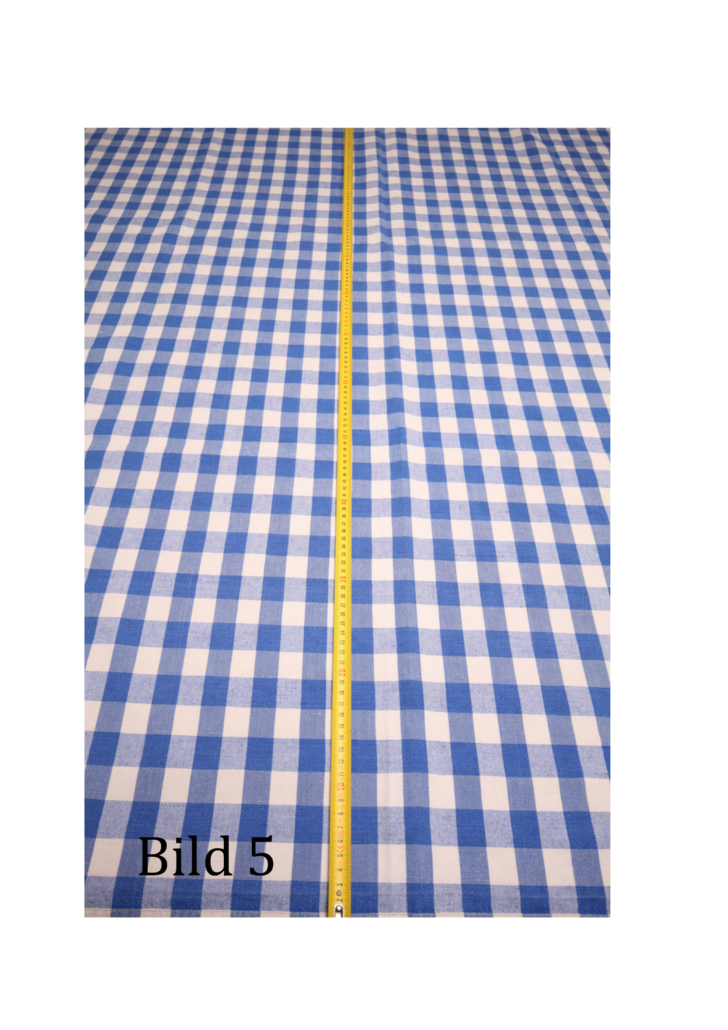
The shift was now reset to zero and the camera housing was tilted down around the ball head of the tripod so that the image field reached vertically below the lens. Here, too, the sharpness was largely retained over the entire image area (Fig. 5). The slight loss of sharpness in the edge area is explained by the fact that the tripod was rotated around the ball head, which resulted in a change in the vertical distance to the focussing plane.
Test 5:
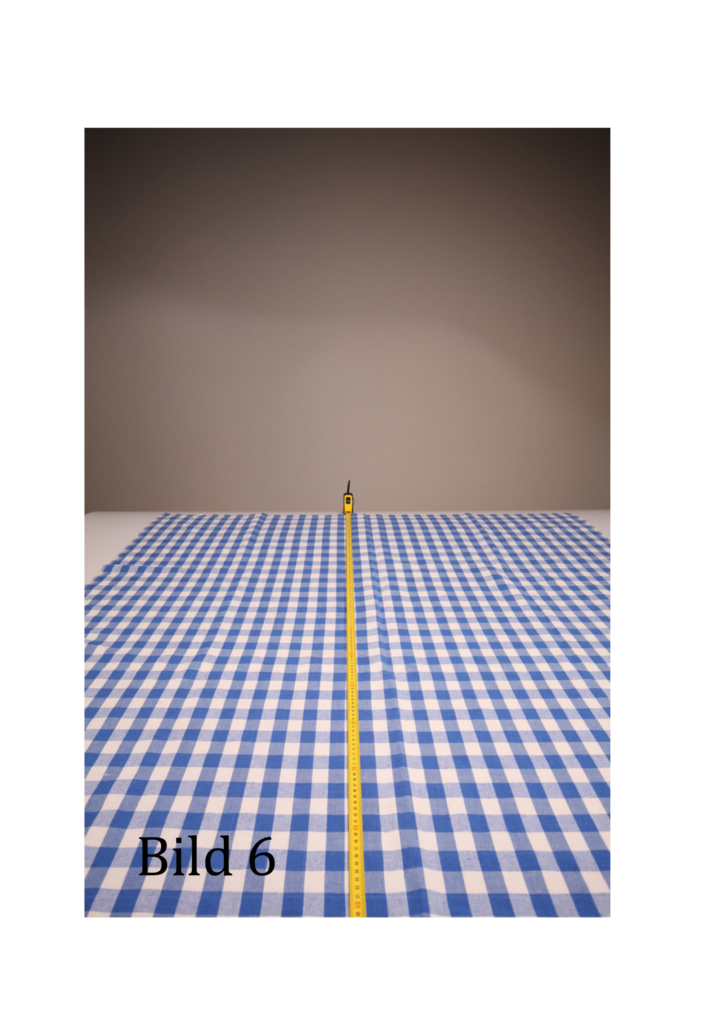
The camera housing was now tilted up around the ball head of the tripod until the center of the image caught the end of the tape measure (Fig. 6). Here, too, the sharpness was retained over the full range. With such an alignment of the camera, the wide horizon of a landscape image would also appear approximately in the center of the image, so that even higher mountains could be recorded.
Conclusions
The table is very helpful when setting the tilt angle and considerably reduces the time required for precise focusing (test 2). It is sufficient to focus on the center of the image. Provided that the tilt angle is correctly fixed and the camera distance to the focal plane does not change, shifting the lens has no effect on the sharpness (test 3). The inclination of the camera housing is then also irrelevant within the specified limits (tests 4 and 5).
The method soon reaches its limits at very small distances between the camera and the focussing plane (less than approx. 30 cm), because incorrect measurements in the short distance ranges have a much stronger effect on the tilt angle and the focusing. In landscape photography, however, such small distances tend to be the exception. Then you can fall back on the usual focus by iteratively changing the setting values.

